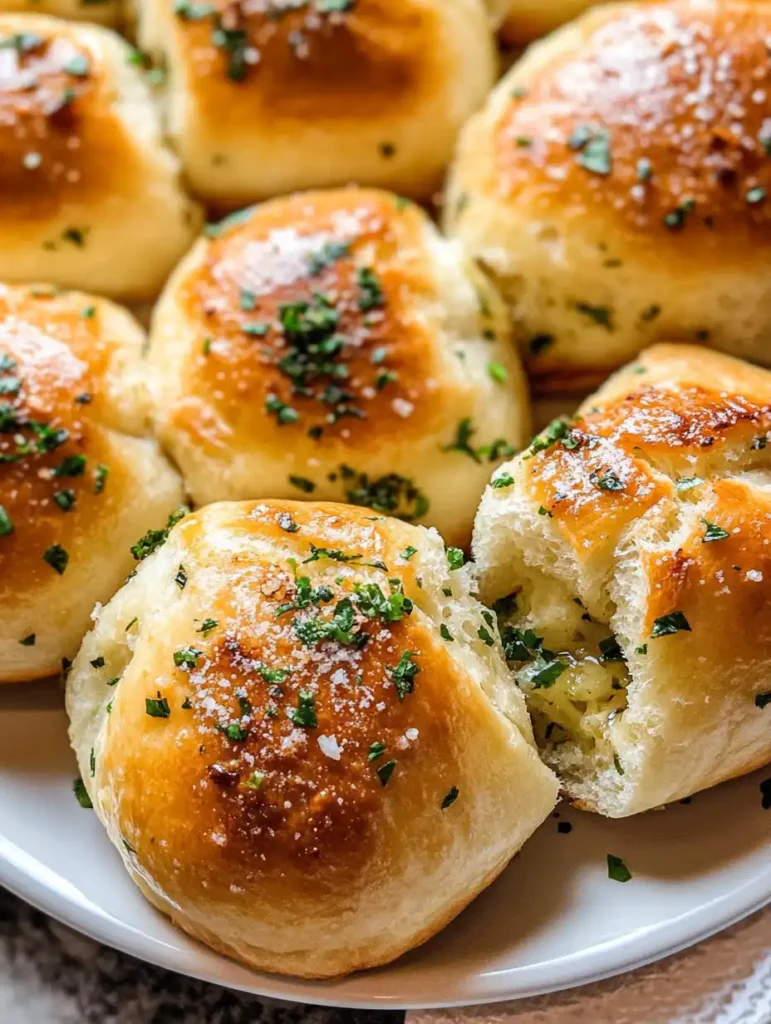
Garlic bread rolls are the ultimate comfort food—soft, fluffy, and bursting with rich garlic flavor. Whether you’re serving them as a side dish for dinner, bringing them to a potluck, or simply indulging in a carb-filled treat, these homemade rolls are guaranteed to impress. Made from scratch with fresh garlic, herbs, and buttery goodness, they’re a step up from your average dinner roll. In this guide, we’ll walk you through everything you need to know to make the perfect garlic bread rolls at home.
Why You’ll Love These Garlic Bread Rolls
- Packed with Flavor: Every bite is infused with fresh garlic and herb goodness.
- Soft and Fluffy Texture: The dough is tender and airy, perfect for soaking up soups, sauces, or just butter.
- Homemade with Love: Skip the store-bought rolls and enjoy the satisfaction of baking from scratch.
- Versatile: Serve them warm as a side dish or enjoy them on their own as a snack.
Ingredients You’ll Need
Here’s what you’ll need to make these delicious garlic bread rolls:
For the Dough:
- Unsalted Butter: Adds richness to the dough.
- Minced Garlic: Fresh garlic for that bold flavor.
- All-Purpose Flour: The base of your dough. Make sure to measure it correctly!
- Fresh Parsley: Adds a pop of color and flavor.
- Granulated Sugar: Helps activate the yeast and balances the savory flavors.
- Instant Yeast: Makes the dough rise quickly and evenly.
- Fine Sea Salt: Enhances all the flavors.
- Milk: Warmed to 110°F to activate the yeast.
- Egg: Adds structure and richness to the dough.
For the Garlic Butter Topping:
- Unsalted Butter: Because more butter is always better!
- Minced Garlic: For brushing on top after baking.
- Fresh Parsley: To garnish and add flavor.
- Flaky Sea Salt: Optional, but adds a delightful crunch and burst of saltiness.
Step-by-Step Instructions
1. Prepare Your Baking Dish
Lightly butter the bottom and sides of a 9×13-inch pan and set it aside. This will prevent the rolls from sticking and give them a golden crust on the bottom.
2. Make the Garlic Butter for the Dough
In a small pot, melt the butter and add the minced garlic. Cook for 1-2 minutes until fragrant, then remove from heat and let it cool while you measure out the rest of your ingredients.
3. Mix the Dough
In the bowl of a stand mixer fitted with a dough hook, combine the flour, parsley, sugar, yeast, and salt. Add the warmed milk, egg, and cooled garlic butter mixture. Knead on low speed for 10-12 minutes until the dough is smooth and slightly tacky. If it’s too sticky, add one tablespoon of flour at a time until it becomes workable.
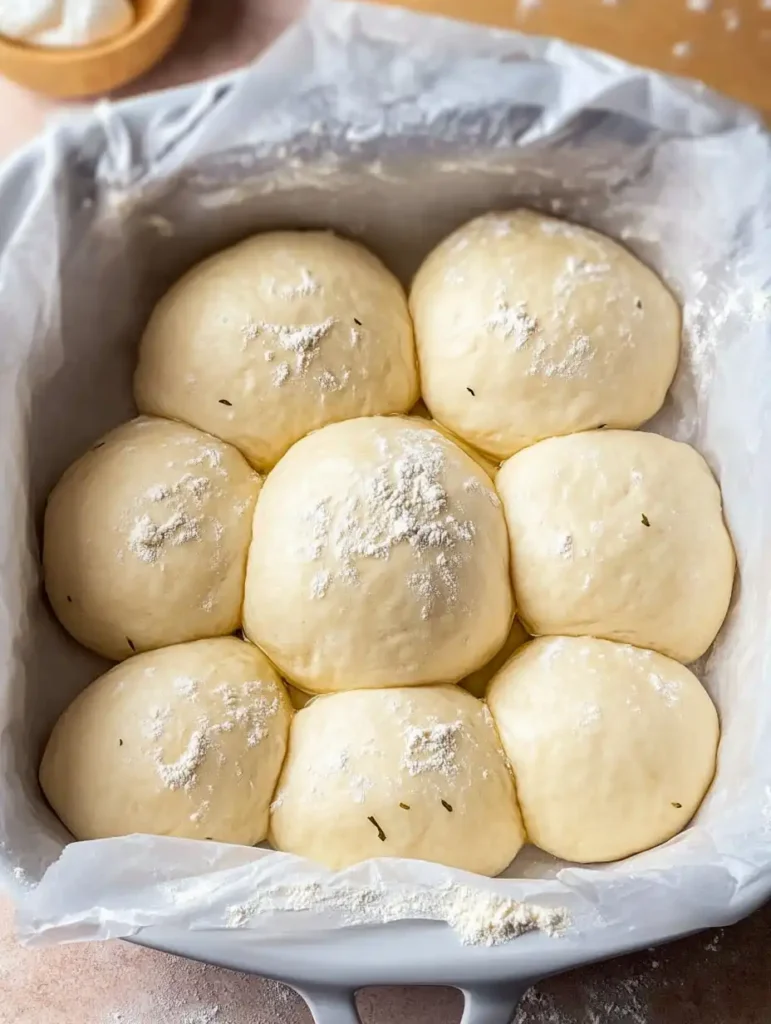
4. Shape the Rolls
Divide the dough into 12 equal portions (about 67 grams each). Roll each portion into a smooth ball by cupping your hand over it and rolling it on a flat surface. Pinch the seams at the bottom to keep them tight. Place the balls into your prepared pan, leaving a little space between each one for rising.
5. Let Them Rise
Cover the pan with plastic wrap or a clean kitchen towel and let the rolls rise in a warm place until they double in size—this will take about 1-2 hours depending on your kitchen temperature.
6. Bake the Rolls
Preheat your oven to 350°F (180°C). Brush the tops of the rolls with beaten egg for that golden-brown finish, then bake for 20-30 minutes or until they’re beautifully golden on top.
7. Add the Garlic Butter Topping
While the rolls are baking, prepare your garlic butter topping by melting butter in a small pot and cooking minced garlic for 1-2 minutes until fragrant. Stir in chopped parsley and set aside. Once the rolls come out of the oven, immediately brush them with this garlic butter mixture for maximum flavor absorption. Sprinkle with flaky sea salt if desired.
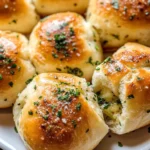
8. Serve Warm
These garlic bread rolls are best served warm out of the oven! Pair them with soups, pasta dishes, or enjoy them on their own as a treat.
Tips for Success
- Measure Your Ingredients Correctly: Always use a spoon to scoop flour into your measuring cup and level it off with a knife to avoid using too much flour. For best results, use a kitchen scale!
- Activate Your Yeast Properly: If using active dry yeast instead of instant yeast, make sure to dissolve it in warm milk with a pinch of sugar first, letting it foam before adding it to your dough mixture.
- Don’t Skip the Egg Wash: Brushing beaten egg on top before baking gives these rolls their gorgeous golden color.
- Serve Fresh: These rolls are best enjoyed fresh from the oven while still warm and fluffy.
FAQs About Garlic Bread Rolls
Q1: Can I Make These Rolls Ahead of Time?
Yes! After shaping the rolls and placing them in the baking pan, cover them tightly with plastic wrap and refrigerate overnight. The next day, let them rise at room temperature until doubled in size before baking (this may take a few hours).
Q2: How Do I Store Leftover Rolls?
Store leftover rolls in an airtight container or ziplock bag at room temperature for up to 2-3 days. To reheat, cover them with foil and bake at 350°F until warmed through or microwave for 20-30 seconds.
Q3: Can I Freeze These Rolls?
Absolutely! After baking, let them cool completely before transferring them to an airtight container or freezer-safe bag. They can be frozen for up to one month. Reheat in the oven at 350°F until warmed through before serving.
Q4: What Can I Serve with Garlic Bread Rolls?
These rolls pair beautifully with soups like tomato basil or creamy potato leek soup, pasta dishes like spaghetti or lasagna, or even as part of a charcuterie board.
Q5: Can I Use Dried Parsley Instead of Fresh?
While fresh parsley provides better flavor and texture, you can use dried parsley in a pinch—just use half the amount called for in the recipe.
Final Thoughts
Homemade garlic bread rolls are a labor of love that’s well worth the effort. With their soft texture and bold garlic herb flavor, they’re sure to become a family favorite for any occasion. Whether you’re hosting a dinner party or just treating yourself, these rolls are guaranteed to steal the show.
So why wait? Grab your ingredients, roll up your sleeves, and get baking! Your kitchen will smell amazing, and your taste buds will thank you! – 4105
PrintGarlic Bread Rolls
Soft, fluffy dinner rolls packed with garlic flavor! These homemade rolls are made with fresh garlic in the dough and brushed with garlic herb butter after baking. Perfect for any dinner table, these rolls are easy to make and even better served warm.
- Prep Time: 20 minutes
- Cook Time: 20-30 minutes
- Total Time: 1-2 hours (rising)
- Yield: ~2 hours 30 minutes
- Category: 12 rolls
- Method: Bread
- Cuisine: American
- Diet: Vegetarian
Ingredients
For the Rolls:
4 1/2 tablespoons (60g) unsalted butter
2 tablespoons minced garlic
3 1/2 cups + 1 tablespoon (434g) all-purpose flour (see notes for measuring)
3 tablespoons chopped fresh parsley
1 tablespoon (15g) granulated sugar
2 1/4 teaspoons instant yeast
1 teaspoon fine sea salt
1 cup (225g) whole or 2% milk, warmed to 110°F
1 large egg (55g), room temperature
1 beaten egg, for brushing the tops
For the Garlic Butter:
2 tablespoons (28g) unsalted butter
1 tablespoon minced garlic
1 tablespoon chopped fresh parsley
Flaky sea salt, for finishing
Instructions
Prepare the Baking Pan:
Lightly butter the bottom and sides of a 9×13 pan and set it aside.
Make the Garlic Butter for the Dough:
In a small pot, melt the butter and add the minced garlic. Cook for 1-2 minutes or until fragrant. Remove from heat and let cool while measuring the other ingredients.
Mix the Dough:
In a stand mixing bowl, combine the flour, parsley, sugar, yeast, and salt. Add the warmed milk, egg, and cooled garlic butter. Knead on low speed with the dough hook until the dough is smooth, soft, and slightly tacky, about 10-12 minutes. If the dough is too sticky, add one tablespoon of flour at a time until workable.
Shape the Rolls:
Divide the kneaded dough into 12 equal portions (about 67g each). Shape each piece into a smooth ball, pinching the bottom to seal the seam. Place the dough balls in the prepared baking pan. Cover with plastic wrap or a clean kitchen towel and let rise in a warm place until doubled in size, about 1-2 hours.
Preheat the Oven:
Preheat your oven to 350°F (180°C).
Bake the Rolls:
Brush the tops of the risen rolls with the beaten egg wash. Bake for 20-30 minutes, or until the tops are golden brown.
Make the Garlic Butter Topping:
While the rolls are baking, melt the butter in a small pot and add the minced garlic. Cook for 1-2 minutes until fragrant, then remove from heat and stir in the parsley.
Finish the Rolls:
When the rolls come out of the oven, immediately brush them with the garlic butter. Sprinkle with flaky sea salt if desired. Serve warm and enjoy!
Notes
- Measuring Flour: Use the spoon-and-level method for measuring flour or, for best results, use a kitchen scale.
- Using Active Dry Yeast: If substituting active dry yeast for instant yeast, activate it first by stirring it into the warm milk with a sprinkle of sugar. Let it sit for 5 minutes until foamy.
- Storage: Store rolls in an airtight container at room temperature for 2-3 days.
- Freezing: Cool rolls completely, then transfer to an airtight container and freeze for up to 1 month.
- Make-Ahead: Shape the rolls, cover tightly with plastic wrap, and refrigerate overnight. Let them double in size at room temperature before baking.
Nutrition
- Serving Size: 1 roll
- Calories: ~190
- Sugar: ~7g
- Sodium: ~4g
- Fat: ~3g
- Saturated Fat: 0g
- Unsaturated Fat: ~25g
- Trans Fat: ~1g
- Carbohydrates: ~3g
- Fiber: ~5g
- Protein: ~220mg
- Cholesterol: ~40mg