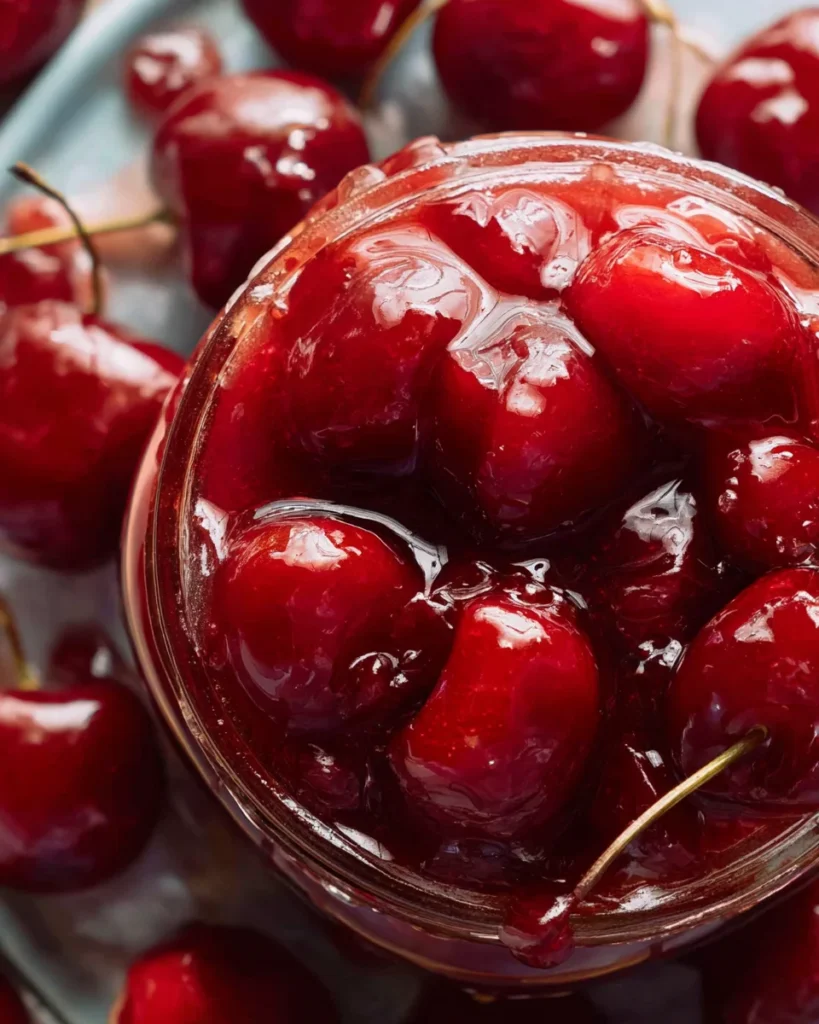
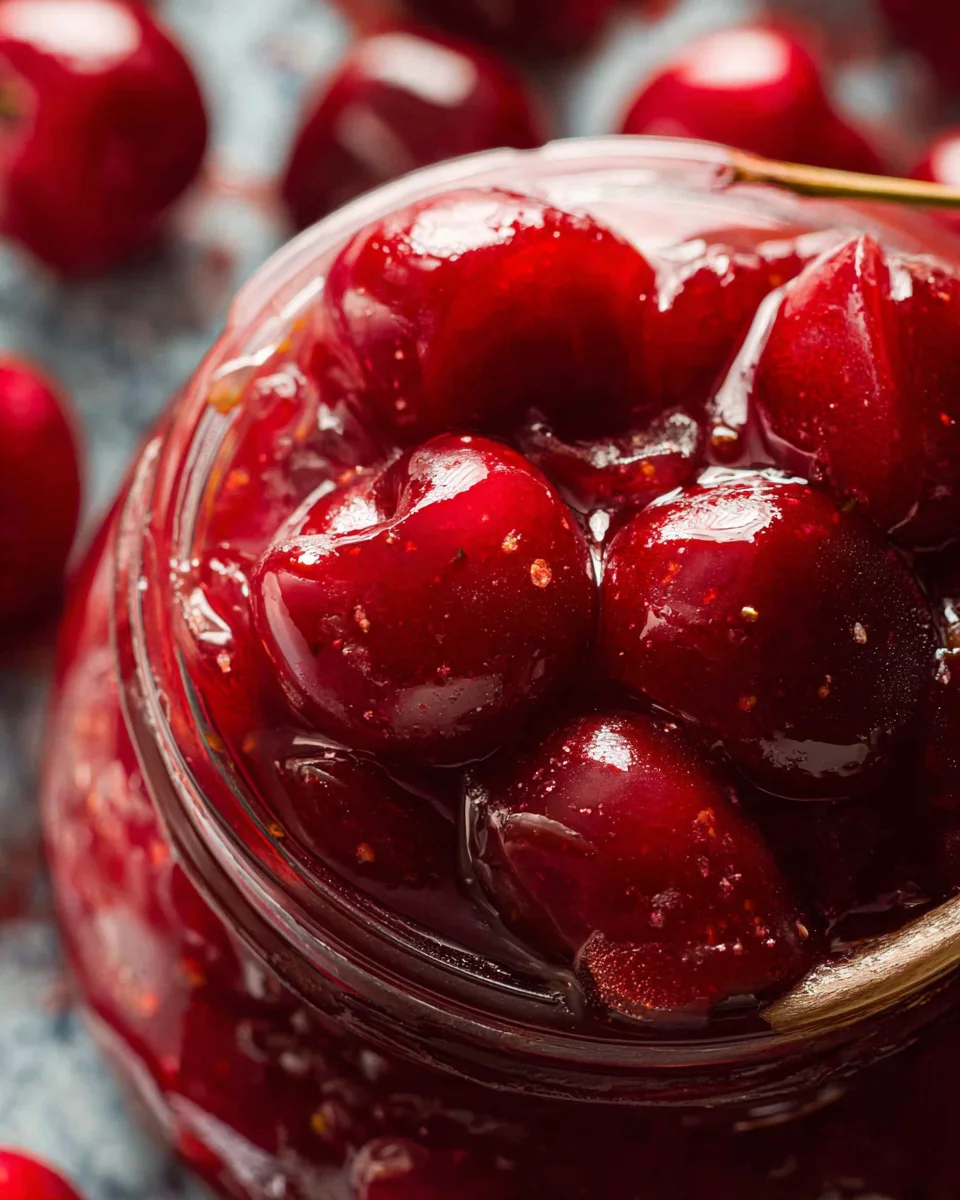
Make the most out of your cherry haul with this simple and delicious homemade cherry pie filling recipe! Whether you’re using fresh or frozen fruit, this filling can be easily made with few ingredients in little time. Perfect for pies, tarts, or simply as a topping, this cherry pie filling will elevate any dessert.
Why You’ll Love This Recipe
- Quick and Easy: This recipe takes only 25 minutes from start to finish, making it perfect for busy bakers.
- Versatile Use: Use this cherry pie filling for pies, pancakes, ice cream, or yogurt.
- Natural Sweetness: With options for maple syrup or honey, you can customize the sweetness to your liking.
- Fresh Flavor: Using real cherries ensures a vibrant flavor that outshines store-bought options.
- Simple Ingredients: Made with just a few pantry staples you likely already have at home.
Tools and Preparation
Before you start making your cherry pie filling, gather these essential tools to ensure a smooth process.
Essential Tools and Equipment
- Medium sauce pan
- Mixing spoon
- Measuring cups
- Measuring spoons
- Airtight container
Importance of Each Tool
- Medium sauce pan: A must-have for cooking the cherries evenly and achieving the right consistency.
- Mixing spoon: Essential for combining ingredients smoothly without damaging the fruit.
- Airtight container: Keeps your filling fresh for up to a week after preparation.
Ingredients
Gather the following ingredients to create your homemade cherry pie filling:
For the Filling
- 4 1/2 cups | 1.5 lb cherries, pitted
- 1/3 cup | 80 ml water
- 2 tablespoons | 30 ml lemon juice
- 2/3 cup maple syrup (210 g) or honey (226 g) or 1 cup white granulated sugar (200 g)
- 1/4 cup | 30 g cornstarch
- 1 teaspoon vanilla extract
- 1/4 teaspoon almond extract (optional)
- Pinch of salt
How to Make Cherry Pie Filling
Step 1: Combine Ingredients
Start by mixing all the ingredients in a medium saucepan. Ensure the cherries are well distributed throughout.
Step 2: Cook the Mixture
Bring the mixture to a boil over medium heat. Once boiling, reduce the temperature to maintain a simmer. Let it simmer for about 10-15 minutes. Stir occasionally until the mixture thickens and becomes glossy.
Step 3: Adjust Sweetness
Carefully taste your filling and adjust sweetness if necessary by adding more maple syrup, honey, or sugar as desired.
Step 4: Cool and Store
Once cooked, let the mixture cool down. Transfer it to an airtight container and store it in the refrigerator for up to a week.
This easy homemade cherry pie filling is ready to enhance your desserts with its delightful flavor! Enjoy your baking!
How to Serve Cherry Pie Filling
Cherry pie filling is a versatile delight that can enhance various dishes. Whether you’re looking to top off desserts, breakfast items, or even savory meals, this filling can elevate any dish with its sweet and tart flavor.
On Ice Cream
- Vanilla ice cream: A classic pairing that allows the cherry filling to shine.
- Chocolate ice cream: The rich chocolate complements the sweet cherries perfectly.
- Yogurt parfait: Layer cherry pie filling with yogurt and granola for a tasty breakfast.
In Pancakes
- Cherry-stuffed pancakes: Pour the filling into pancake batter while cooking for a fruity surprise.
- Topped pancakes: Drizzle cherry pie filling over your stack of pancakes for added sweetness.
As a Dessert Topping
- Cheesecake: Use as a topping for cheesecake to add color and flavor.
- Cake: Spread over sponge cake or pound cake for a simple yet elegant dessert.
With Savory Dishes
- Glazed chicken: Add cherry pie filling as a glaze for roasted or grilled chicken.
- Pork chops: Serve alongside pork chops for a sweet and savory combination.

How to Perfect Cherry Pie Filling
Creating the perfect cherry pie filling takes just a few tips. With these suggestions, you can enhance the flavor and texture of your filling.
- Choose ripe cherries: For the best flavor, select fresh, ripe cherries that are firm and deeply colored.
- Adjust sweetness: Taste your mixture before cooling it down. Feel free to add more maple syrup or sugar if desired.
- Thicker consistency: If you prefer a thicker filling, increase the cornstarch slightly while mixing.
- Flavor boost with extracts: Adding almond extract enhances the overall flavor profile of your cherry pie filling.
- Cool completely: Allow your cherry pie filling to cool fully before using it in recipes. This helps it set properly.
Best Side Dishes for Cherry Pie Filling
Cherry pie filling is fantastic not just on its own but also when paired with complementary side dishes. Here are some great options to consider:
- Vanilla Ice Cream: A scoop of creamy vanilla ice cream balances out the tartness of the cherries.
- Pancakes: Fluffy pancakes topped with cherry pie filling make for a delightful breakfast treat.
- Cheesecake: The creamy texture of cheesecake pairs beautifully with sweet cherry topping.
- French Toast: Serve warm cherry pie filling over cinnamon-dusted French toast for an indulgent brunch option.
- Oatmeal: Stirring in cherry pie filling makes instant oatmeal more exciting and flavorful.
- Cornbread: Sweet cornbread served with cherry pie filling creates a unique dessert combination.
Common Mistakes to Avoid
Making cherry pie filling can be simple, but certain mistakes can affect the outcome. Here are some common pitfalls to watch out for.
- Using unpitted cherries – Always ensure your cherries are pitted before cooking. Unpitted cherries can ruin the texture and make it hard to enjoy.
- Neglecting to taste the mixture – Don’t skip tasting during cooking! Adjust the sweetness level to suit your preferences for a more enjoyable filling.
- Overcooking the filling – Watch your cooking time closely. Overcooked filling can become too thick or even burn, leading to an undesirable flavor.
- Skipping lemon juice – This ingredient adds acidity and balances sweetness. Omitting it may result in a one-dimensional flavor profile.
- Not allowing it to cool properly – Letting the filling cool is essential for achieving the right consistency. Skipping this step can lead to a runny pie filling.
Storage & Reheating Instructions
Refrigerator Storage
- Store in an airtight container.
- Keeps well for up to one week in the fridge.
Freezing Cherry Pie Filling
- Use freezer-safe containers or bags.
- Can be frozen for up to three months for best quality.
Reheating Cherry Pie Filling
- Oven – Preheat oven to 350°F (175°C) and heat until warm, about 10-15 minutes.
- Microwave – Place in a microwave-safe bowl. Heat in short bursts of 30 seconds, stirring in between until warm.
- Stovetop – Heat gently over low heat, stirring frequently until warmed through.
Frequently Asked Questions
Here are some common questions about making cherry pie filling that might help you along the way.
Can I use frozen cherries for Cherry Pie Filling?
Yes! Frozen cherries work great. Just thaw them first and drain excess liquid before use.
How do I thicken Cherry Pie Filling?
Cornstarch is your best friend for thickening. Ensure it’s mixed well into the ingredients before cooking.
What sweeteners can I use besides sugar?
Maple syrup or honey can be substituted for sugar, offering different flavor profiles while keeping it delicious!
How long does homemade Cherry Pie Filling last?
It lasts up to one week in the refrigerator and can be frozen for up to three months without losing quality.
Final Thoughts
This homemade cherry pie filling is not only easy but also incredibly versatile. You can customize it with spices or different sweeteners based on your taste preferences. Whether you’re making a classic pie or using it as a topping, this recipe brings joy and warmth to any dessert! Try it today and enjoy its delightful flavors.
Cherry Pie Filling

Elevate your dessert game with this homemade cherry pie filling that’s bursting with flavor! Perfect for both fresh and frozen cherries, this quick and easy recipe will have you enjoying a delightful sweet-tart mixture in just 25 minutes. Use it to create luscious pies, top off ice cream, or enhance pancakes for a delicious breakfast treat. With natural sweetness from maple syrup or honey, you can tailor the flavors to your liking while enjoying the vibrant taste of real cherries. This versatile filling is a must-have in every baker’s kitchen!
- Prep Time: 10 minutes
- Cook Time: 15 minutes
- Total Time: 25 minutes
- Yield: Approximately 6 servings 1x
- Category: Dessert
- Method: Cooking
- Cuisine: American
Ingredients
- 4 1/2 cups (1.5 lb) cherries, pitted
- 1/3 cup (80 ml) water
- 2 tablespoons (30 ml) lemon juice
- 2/3 cup maple syrup (210 g), honey (226 g), or 1 cup granulated sugar (200 g)
- 1/4 cup (30 g) cornstarch
- 1 teaspoon vanilla extract
- Pinch of salt
Instructions
- In a medium saucepan, combine all the ingredients and stir until well mixed.
- Bring the mixture to a boil over medium heat. Once boiling, reduce heat and let it simmer for about 10-15 minutes, stirring occasionally until thickened.
- Taste your filling and adjust sweetness if needed by adding more sweetener.
- Allow the mixture to cool before transferring to an airtight container for storage.
Nutrition
- Serving Size: 1/4 cup (60g)
- Calories: 70
- Sugar: 14g
- Sodium: 5mg
- Fat: 0g
- Saturated Fat: 0g
- Unsaturated Fat: 0g
- Trans Fat: 0g
- Carbohydrates: 18g
- Fiber: 1g
- Protein: <1g
- Cholesterol: 0mg