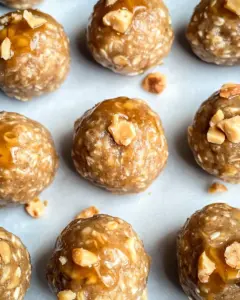
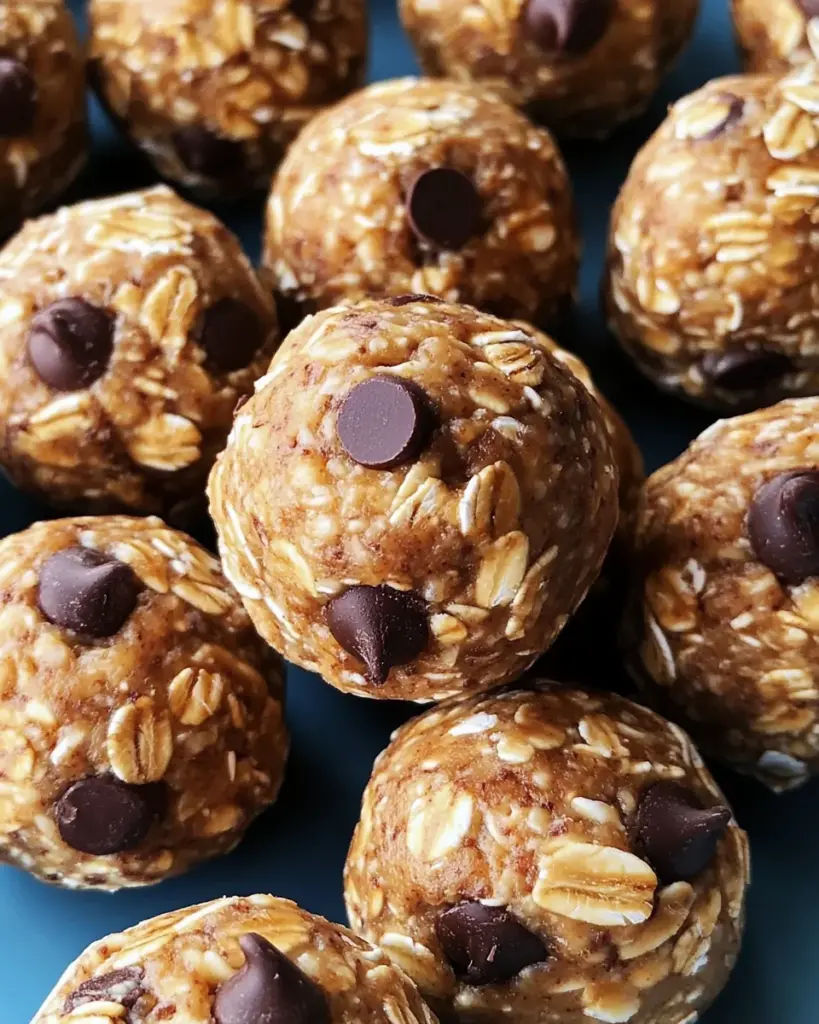
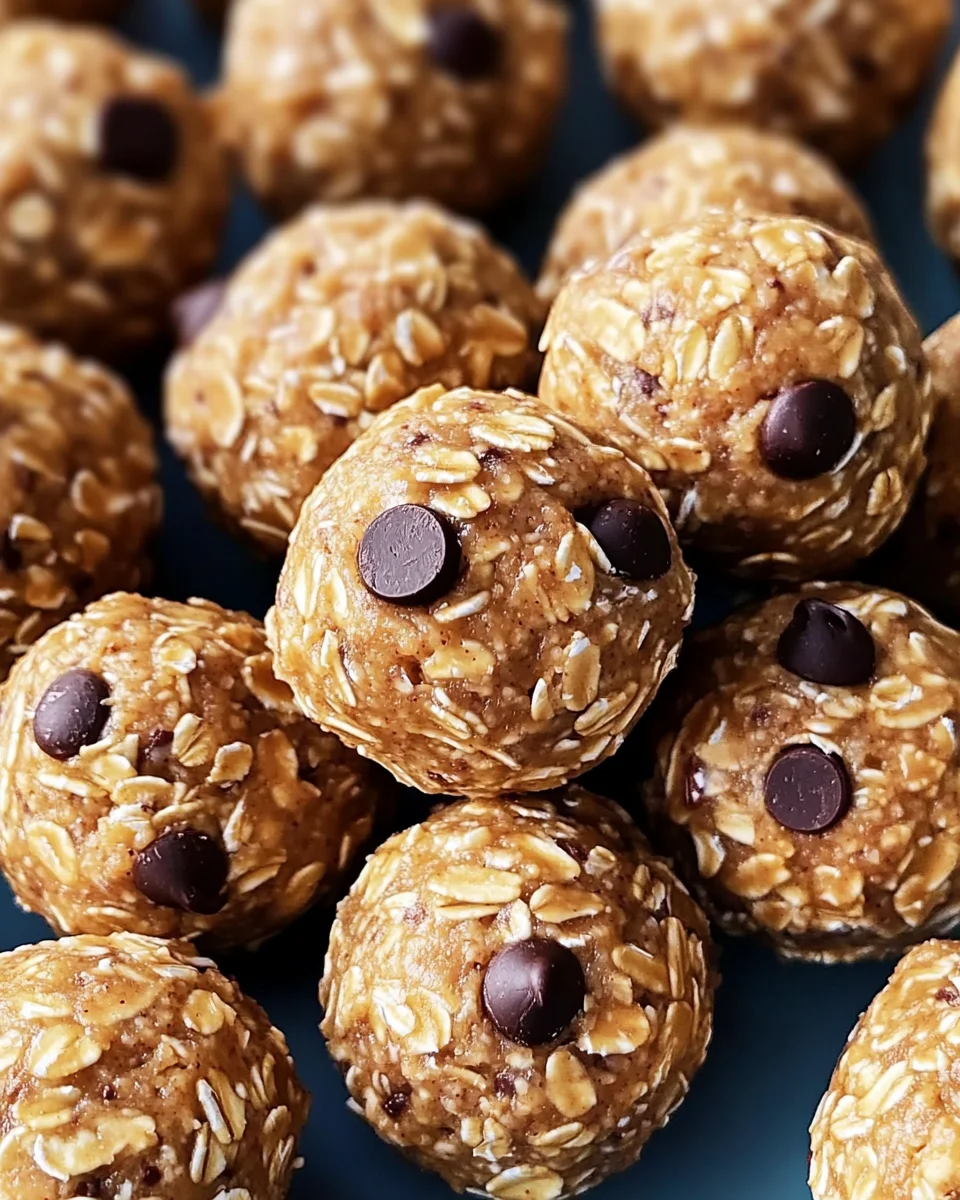
No-Bake Protein Balls are an excellent solution for a quick and healthy snack. These tasty treats are packed with protein, oats, and nut butter, making them ideal for meal prep or as post-workout fuel. Whether you need a nutritious energy bite during the day or a sweet treat on the go, these no-bake protein balls fit perfectly into any occasion.
Why You’ll Love This Recipe
- Quick to Prepare: With just 15 minutes of prep time, you can whip up a batch in no time.
- Healthy Snack Option: Packed with protein and wholesome ingredients, these bites are a guilt-free treat.
- Customizable: Feel free to swap out ingredients based on your dietary needs or preferences.
- Perfect for Meal Prep: Make them ahead of time and have a healthy snack ready when you need it.
- Kid-Friendly: These protein balls are a hit with kids and adults alike!
Tools and Preparation
To make your No-Bake Protein Balls, you’ll need some basic kitchen tools. Having the right equipment helps streamline the process and ensures great results.
Essential Tools and Equipment
- Mixing bowl
- Measuring cups
- Spoon or spatula
- Baking sheet
- Parchment paper
Importance of Each Tool
- Mixing bowl: A large bowl allows enough space to combine all ingredients without making a mess.
- Measuring cups: Accurate measurements are essential for achieving the right consistency in your protein balls.
- Baking sheet: This is used to place the rolled balls while they chill in the refrigerator.
Ingredients
These No-Bake Protein Balls are a quick and healthy snack packed with protein, oats, and nut butter. Perfect for meal prep, post-workout fuel, or a sweet treat on the go.
Dry Ingredients
- 1 cup rolled oats
- 1/2 cup vanilla protein powder
- 2 tablespoons chia seeds
- Pinch of salt
Wet Ingredients
- 1/2 cup natural peanut butter
- 1/3 cup honey or maple syrup
- 1 teaspoon vanilla extract
Add-ins
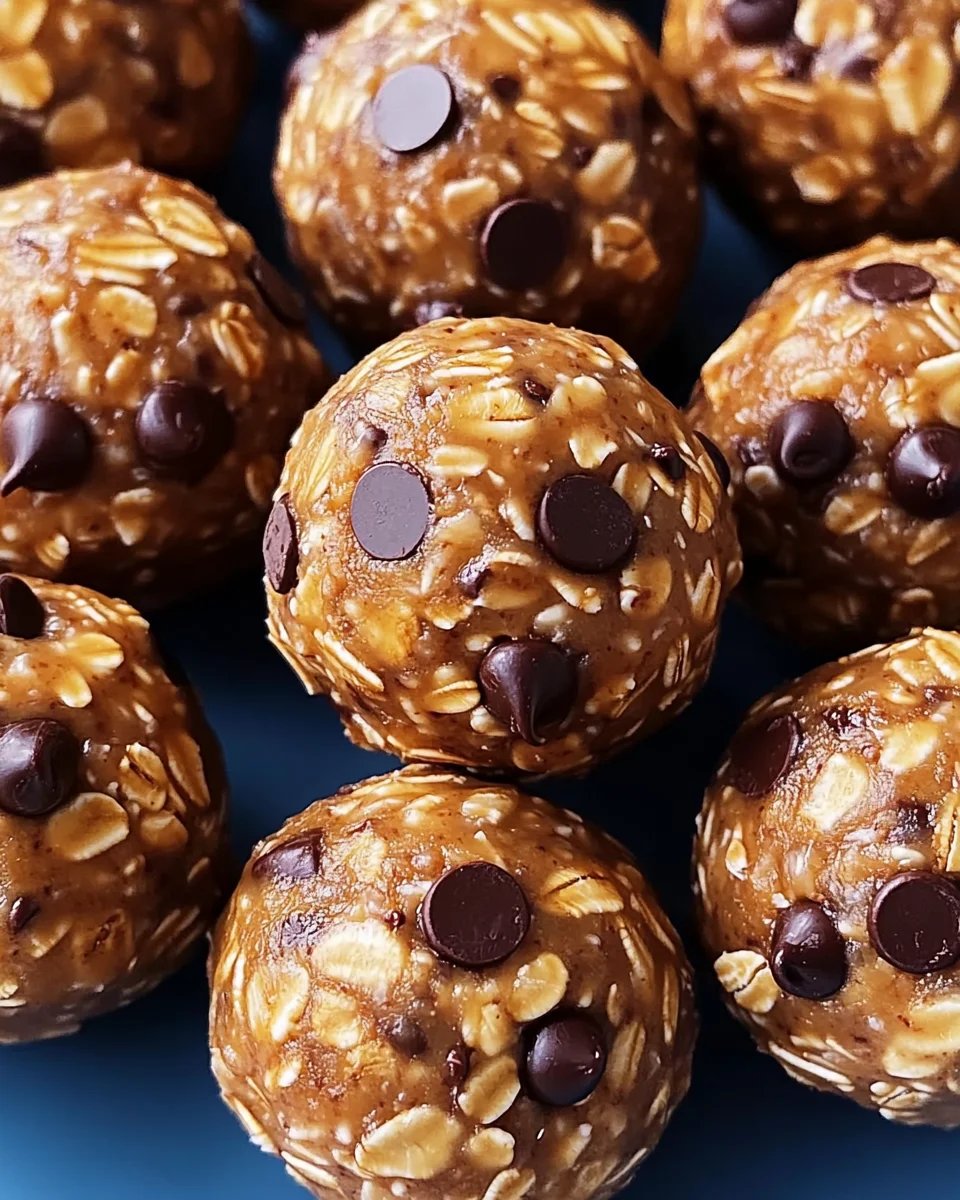
- 1/4 cup mini chocolate chips
How to Make No-Bake Protein Balls
Step 1: Combine Dry Ingredients
In a large mixing bowl, combine the rolled oats, protein powder, chia seeds, and salt. Stir well to ensure even distribution.
Step 2: Add Wet Ingredients
Add the peanut butter, honey (or maple syrup), and vanilla extract to the dry mixture.
Step 3: Mix Until Combined
Mix everything together until a thick, sticky dough forms. If the mixture seems too dry, add more honey or a splash of milk to achieve the right consistency.
Step 4: Fold in Chocolate Chips
Fold in the mini chocolate chips until they are evenly distributed throughout the mixture.
Step 5: Roll into Balls
Scoop out tablespoon-sized portions of the mixture and roll them into balls using your hands.
Step 6: Chill Before Serving
Place the protein balls on a baking sheet lined with parchment paper. Refrigerate for at least 30 minutes before serving to help them firm up.
These No-Bake Protein Balls yield approximately 16 servings. Enjoy as an energizing snack throughout your day!
How to Serve No-Bake Protein Balls
These No-Bake Protein Balls are versatile and can be enjoyed in many ways. Whether you’re looking for a quick snack or a nutritious energy boost, here are some fun serving suggestions.
As an On-the-Go Snack
- Perfect for busy mornings or afternoon cravings, these protein balls are easy to grab and eat without any mess.
Paired with Yogurt
- Crumble a few No-Bake Protein Balls into a bowl of Greek yogurt for added texture and flavor. This combination also boosts your protein intake.
With Fresh Fruit
- Serve alongside sliced bananas or apples. The sweetness of the fruit complements the rich taste of the protein balls nicely.
In a Smoothie Bowl
- Blend your favorite fruits and pour them into a bowl, then top with chopped No-Bake Protein Balls for crunch and nutrition.
As a Post-Workout Treat
- Enjoy these protein-packed bites after your workout to help replenish energy and aid muscle recovery.
Dipped in Dark Chocolate
- Melt some dark chocolate and dip half of each ball for an indulgent yet healthy treat that satisfies sweet cravings.
How to Perfect No-Bake Protein Balls
Making perfect No-Bake Protein Balls is simple with a few tips. Here are some great ideas to ensure they turn out just right:
- Use fresh ingredients – Always check the freshness of your oats, nut butter, and sweeteners to enhance flavor.
- Adjust consistency – If the mixture seems too dry, add more peanut butter or honey; if it’s too wet, add extra oats or protein powder.
- Chill properly – Refrigerating the balls for at least 30 minutes helps them firm up and makes rolling easier.
- Experiment with flavors – Feel free to add spices like cinnamon or nutmeg for extra flavor, or swap out chocolate chips for dried fruits.
- Store correctly – Keep leftovers in an airtight container in the fridge to maintain freshness and texture.
- Use different nut butters – Try using almond butter or cashew butter for variety in taste and nutrition.
Best Side Dishes for No-Bake Protein Balls
Pairing side dishes with No-Bake Protein Balls can enhance your snacking experience. Here are some delicious options:
- Greek Yogurt Parfait – Layer Greek yogurt with berries and granola for a refreshing meal that complements the protein balls well.
- Veggie Sticks with Hummus – Crunchy veggies like carrots or cucumbers dipped in hummus make for a healthy crunch alongside your snack.
- Fruit Salad – A mix of seasonal fruits adds natural sweetness that balances the richness of the protein balls.
- Nut Mix – A handful of mixed nuts provides healthy fats and additional protein, making it a satisfying side option.
- Oatmeal Bowl – Top warm oatmeal with chopped protein balls for an extra hearty breakfast or snack option.
- Smoothie – A fruit-based smoothie pairs well with these bites, making it perfect for breakfast or post-workout fuel.
- Rice Cakes – Spread some nut butter on rice cakes as an additional crunchy treat that goes great with the chewy texture of the protein balls.
- Chia Seed Pudding – This creamy, nutritious pudding is light but filling, complementing the density of No-Bake Protein Balls perfectly.
Common Mistakes to Avoid
Making No-Bake Protein Balls can be simple, but there are a few common mistakes to watch out for to ensure they turn out great.
- Using the wrong nut butter: Different nut butters have different consistencies. Stick to natural peanut butter or almond butter for the best results.
- Skipping the chill time: Not refrigerating the protein balls can lead to a crumbly texture. Always let them chill for at least 30 minutes.
- Overmixing the ingredients: Mixing too much can make the mixture dry. Combine just until everything is blended for a perfect consistency.
- Neglecting portion sizes: Making the balls too large can increase calorie intake. Stick to tablespoon-sized portions for controlled snacking.
- Not adjusting sweetness: If you prefer sweeter bites, don’t hesitate to add a bit more honey or maple syrup. Taste as you go!
Storage & Reheating Instructions
Refrigerator Storage
- Store in an airtight container.
- Keep in the fridge for up to one week.
Freezing No-Bake Protein Balls
- Place in a freezer-safe container or bag.
- They can be frozen for up to three months.
Reheating No-Bake Protein Balls
- Oven: Preheat to 350°F and warm for about 5-10 minutes.
- Microwave: Heat on low power for 15-20 seconds until slightly warm.
- Stovetop: Use a non-stick pan on medium heat, turning occasionally for even warming.
Frequently Asked Questions
Here are some common questions about making No-Bake Protein Balls.
How do I customize my No-Bake Protein Balls?
You can customize by adding nuts, seeds, or dried fruits based on your taste preferences.
Can I use a different protein powder?
Yes, feel free to use any flavor of protein powder that you enjoy, such as chocolate or plant-based options.
Are No-Bake Protein Balls gluten-free?
Using certified gluten-free oats will make your No-Bake Protein Balls gluten-free.
How long do No-Bake Protein Balls last?
They last about one week in the refrigerator and up to three months in the freezer.
Final Thoughts
These No-Bake Protein Balls are not only healthy but also incredibly versatile. You can easily customize them with your favorite ingredients like nuts or dried fruits. Try this delightful recipe and enjoy a quick, nutritious snack anytime!
No-Bake Protein Balls

No-Bake Protein Balls are the ultimate quick and healthy snack, ideal for busy days or post-workout fuel. Packed with protein, wholesome oats, and creamy nut butter, these delightful energy bites are not only satisfying but also versatile. In just 15 minutes, you can whip up a batch to keep on hand for a nutritious boost any time of day. Perfect for meal prep, these bites can be customized with your favorite ingredients like dried fruits or different nut butters. Enjoy them as an on-the-go snack, crumbled in yogurt, or alongside fresh fruit for a delicious treat that both kids and adults will love.
- Prep Time: 15 minutes
- Cook Time: 0 minutes
- Total Time: 15 minutes
- Yield: Approximately 16 servings 1x
- Category: Snack
- Method: No-Bake
- Cuisine: American
Ingredients
- 1 cup rolled oats
- 1/2 cup vanilla protein powder
- 2 tablespoons chia seeds
- Pinch of salt
- 1/2 cup natural peanut butter
- 1/3 cup honey or maple syrup
- 1 teaspoon vanilla extract
- 1/4 cup mini chocolate chips
Instructions
- In a large mixing bowl, combine rolled oats, protein powder, chia seeds, and a pinch of salt.
- Add peanut butter, honey (or maple syrup), and vanilla extract to the dry mixture.
- Mix until a thick dough forms; if too dry, add more honey or milk.
- Fold in mini chocolate chips.
- Roll tablespoon-sized portions into balls.
- Chill on a parchment-lined baking sheet for at least 30 minutes before serving.
Nutrition
- Serving Size: 1 ball (28g)
- Calories: 110
- Sugar: 5g
- Sodium: 50mg
- Fat: 4.5g
- Saturated Fat: 0.5g
- Unsaturated Fat: 4g
- Trans Fat: 0g
- Carbohydrates: 15g
- Fiber: 2g
- Protein: 4g
- Cholesterol: 0mg