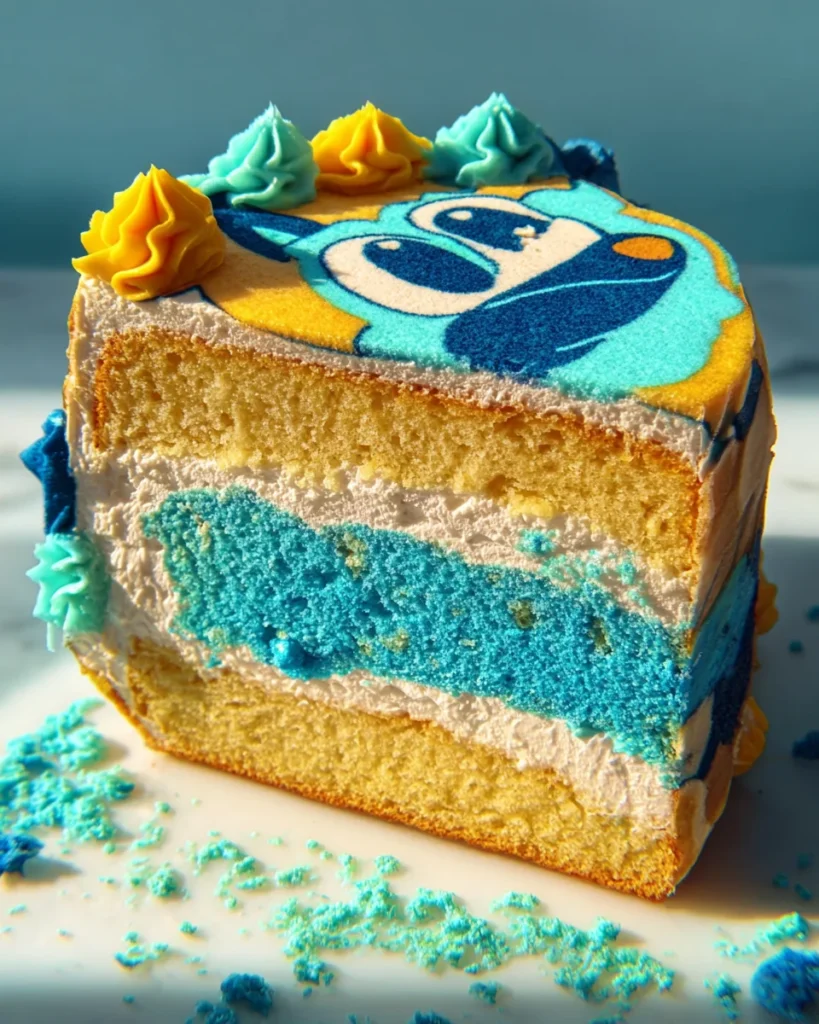
Bluey Sponge Cake is a delightful treat that brings joy to any occasion. With its vibrant colors and light texture, this cake is perfect for birthdays, celebrations, or simply a fun dessert at home. The unique design aspect makes it not just a cake but also an artistic expression. Whether you’re a seasoned baker or a beginner, this recipe is designed to create a delicious masterpiece that everyone will love.
Why You’ll Love This Recipe
- Creative Design: You can customize the cake with any design you desire, making it perfect for themed parties.
- Light and Fluffy: The sponge cake is airy and soft, ensuring every bite melts in your mouth.
- Versatile Serving Options: Serve it plain or add fresh fruit, whipped cream, or jam for added flavor.
- Quick Bake Time: With only 8-9 minutes in the oven, you won’t spend all day waiting for your cake to bake.
- Family-Friendly Fun: This recipe provides an excellent opportunity for family bonding through baking and decorating together.
Tools and Preparation
To get started on your Bluey Sponge Cake, gather the necessary tools and equipment. Having everything ready will make the baking process smoother.
Essential Tools and Equipment
- Stand mixer
- Piping bags
- 8 circular pan
- Parchment paper
- Whisk
Importance of Each Tool
- Stand mixer: Essential for whipping egg whites to stiff peaks, which is crucial for the cake’s fluffy texture.
- Piping bags: Help you create precise designs with your colored batter, ensuring your artistic vision comes to life.
Ingredients
For the Cake Base
- 6 egg yolks
- 4 Tbsp. sugar
- 4 Tbsp. vegetable oil
- 4 Tbsp. whole milk
- 2 tsp. vanilla extract
- 1 cup all-purpose flour
- 6 egg whites
- 2 Tbsp. cornstarch
- 1/2 tsp. vinegar
- 4 Tbsp. sugar
For Decoration and Filling
- Food dye gel (not liquid)
- 2 cups heavy whipping cream
- 5 Tbsp. confectioners sugar
- Dash salt
- 2 tsp. vanilla
- Fresh fruit or jam (optional)
- Blue food gel (optional)
How to Make Bluey Sponge Cake
Step 1: Preheat the Oven
Preheat your oven to 375 degrees Fahrenheit. Grease an 8 circular pan with cooking spray and cut out parchment paper to fit inside perfectly.
Step 2: Prepare Your Egg Yolks and Whites
Separate the egg yolks from the egg whites. Place the yolks in a large bowl and set the egg whites aside in a medium-sized bowl.
Step 3: Mix Wet Ingredients
Whisk together the egg yolks with sugar, vegetable oil, milk, and vanilla until well combined.
Step 4: Combine Dry Ingredients
Sift in the flour and cornstarch into the wet mixture. Whisk until you have a smooth batter.
Step 5: Whip Egg Whites
In a stand mixer fitted with a whisk attachment, beat the egg whites until frothy. Gradually add vinegar and sugar while continuing to whip.
Step 6: Form Stiff Peaks
Continue whisking until stiff peaks form in your egg whites; this step is crucial for achieving that fluffy texture in your Bluey Sponge Cake.
Step 7: Fold Egg Whites
Gently fold the whipped egg whites into the yolk batter until fully combined without over-mixing.
Step 8: Dye Your Batter
Remove small amounts of batter into separate bowls and use food dye gel to color each batch according to your design needs.
Step 9: Fill Piping Bags
Transfer each colored batter into piping bags for easy application on your cake design.
Step 10: Pipe Your Design
Using your traced parchment paper as a guide, pipe black outlines followed by filling them in with colored batter.
Step 11: Cover and Bake
Let your decorated batter sit in the fridge for about 5-8 minutes before piping uncolored batter on top of your design. Bake for 8-9 minutes.
Step 12: Cool Down
Once baked, flip out of the pan immediately and peel off parchment paper while warm. Allow cakes to cool completely before proceeding.
Step 13: Make Whipped Cream
In a clean stand mixer bowl, whisk cream with confectioners’ sugar and vanilla until stiff peaks form.
Step 14: Assemble Your Cake
Layer undesigned cake at the bottom with whipped cream piped on top before adding your designed layer on top. Feel free to add any fillings or decorations you like!
Step 15: Chill Before Serving
Store in the fridge until ready to serve; enjoy!
Step 16: Make Ahead Tips
This Bluey Sponge Cake can be made ahead of time but is best enjoyed fresh! If preparing early, wrap tightly in plastic wrap for freshness.
With these straightforward steps, you’ll create a stunning Bluey Sponge Cake that’s sure to impress!
How to Serve Bluey Sponge Cake
Bluey Sponge Cake is not just a treat for the eyes; it’s also a delicious dessert that can be served in various delightful ways. Whether you’re hosting a birthday party or enjoying a family gathering, here are some creative serving suggestions.
With Fresh Fruits
- Berries: Strawberries, blueberries, and raspberries add a burst of flavor and color.
- Sliced Bananas: These provide sweetness and a creamy texture that pairs wonderfully with the sponge cake.
- Kiwi Slices: Adds tartness and vibrant green color, making your presentation pop.
With Whipped Cream
- Classic Topping: A generous dollop of whipped cream enhances the cake’s light texture.
- Flavored Whipped Cream: Try vanilla or chocolate-flavored whipped cream for an extra indulgent touch.
- Whipped Cream Art: Use piping bags to create decorative shapes on top for visual appeal.
As a Layered Cake
- Layering Option: Place multiple layers of Bluey Sponge Cake with whipped cream in between for a taller cake.
- Fruit Filling: Add fresh fruit or jam between layers for added flavor and moisture.
For Special Occasions
- Birthday Cake: Decorate with themed candles or figurines related to Bluey for children’s parties.
- Picnic Treats: Cut into squares and pack them for outdoor gatherings. They are easy to transport!
How to Perfect Bluey Sponge Cake
To achieve the perfect Bluey Sponge Cake, consider these helpful tips. Each one will help you refine your baking skills and improve the final product.
- Technique: Ensure your egg whites reach stiff peaks before folding them in. This is crucial for achieving a fluffy texture.
- Mixing: Fold gently when combining egg whites with yolk batter. Over-mixing can deflate the batter, leading to a dense cake.
- Piping Skills: Practice your piping techniques on parchment paper before applying them to the batter. This helps achieve cleaner designs.
- Cooling Time: Allow cakes to cool completely before assembling. This prevents melting your whipped cream and keeps your layers intact.
Best Side Dishes for Bluey Sponge Cake
Pairing side dishes with your Bluey Sponge Cake can elevate your dessert experience even further. Here are some great options that complement this delightful cake.
- Ice Cream: Vanilla or chocolate ice cream provides a rich contrast to the light sponge cake.
- Fruit Salad: A refreshing mix of seasonal fruits balances the sweetness of the cake perfectly.
- Custard Sauce: A warm custard sauce adds a creamy richness that enhances every bite.
- Chocolate Sauce: Drizzle over your slice for an extra layer of decadence.
- Lemon Sorbet: The tanginess of sorbet cleanses the palate beautifully after indulging in sweet cake.
- Coffee or Tea: A warm cup complements dessert nicely while offering a soothing end to your meal.
Common Mistakes to Avoid
Making a Bluey Sponge Cake can be fun, but some common mistakes can lead to less-than-perfect results. Here are some pitfalls to watch out for.
- Not separating eggs properly: Ensure egg yolks and whites are separated without any yolk in the whites. This is crucial for achieving stiff peaks.
- Overmixing the batter: When folding in the egg whites, mix gently. Overmixing can deflate the batter and result in a dense cake.
- Incorrect baking temperature: Preheat your oven correctly to ensure even baking. An oven that’s too hot or too cool can affect the cake’s rise and texture.
- Skipping parchment paper: Always line your pan with parchment paper to prevent sticking and make removal easier after baking.
- Not cooling the cake properly: Allow the cake to cool completely before serving or decorating. This helps maintain structure and prevents melting of the whipped cream topping.
Storage & Reheating Instructions
Refrigerator Storage
- Store the cake in an airtight container for up to 3 days.
- Keep it refrigerated to maintain freshness and quality.
Freezing Bluey Sponge Cake
- Wrap individual slices tightly in plastic wrap before placing them in a freezer-safe bag.
- The cake can be frozen for up to 2 months.
Reheating Bluey Sponge Cake
- Oven: Preheat your oven to 350°F (175°C) and cover the cake with foil. Heat for about 10-15 minutes until warmed through.
- Microwave: Place a slice on a microwave-safe plate and heat for about 10-15 seconds. Be careful not to overheat.
- Stovetop: Use a skillet on low heat, covering it with a lid. Warm for about 5 minutes until heated through.
Frequently Asked Questions
Here are some common questions about making a Bluey Sponge Cake, along with their answers.
Can I use different colors for my Bluey Sponge Cake?
Yes! Feel free to use any food dye gel you like to create colorful designs based on your preference.
How long does it take to bake the Bluey Sponge Cake?
The baking time is approximately 8-9 minutes per layer, depending on your oven’s accuracy.
What can I use instead of heavy cream for frosting?
You can substitute heavy cream with whipped topping or cream cheese frosting if you prefer a different flavor or texture.
How should I store leftover Bluey Sponge Cake?
Store leftovers in an airtight container in the refrigerator for up to three days or freeze them for longer storage.
Can I make this cake ahead of time?
Absolutely! You can prepare the cake layers ahead of time, just be sure to store them properly until you’re ready to assemble.
Final Thoughts
The Bluey Sponge Cake is not just a treat; it’s an artistic endeavor that delights both eyes and taste buds. Its versatility allows you to customize flavors and colors, making it perfect for any occasion. Dive into this delightful recipe, and don’t hesitate to experiment with your favorite fillings or decorations!
Bluey Sponge Cake

Indulge in the whimsical delight of Bluey Sponge Cake, a vibrant and airy dessert that’s perfect for birthdays, celebrations, or simply as a fun treat at home. This delightful cake not only captivates with its colorful designs but also offers a light texture that melts in your mouth. Ideal for bakers of all levels, this recipe invites creativity through custom designs and flavor variations. With quick preparation and baking times, you can create an artistic masterpiece that brings joy to any occasion.
- Prep Time: 20 minutes
- Cook Time: 9 minutes
- Total Time: 29 minutes
- Yield: Approximately 12 servings 1x
- Category: Dessert
- Method: Baking
- Cuisine: American
Ingredients
- 6 egg yolks
- 10 Tbsp. sugar (divided)
- 4 Tbsp. vegetable oil
- 4 Tbsp. whole milk
- 2 tsp. vanilla extract
- 1 cup all-purpose flour
- 6 egg whites
- 2 Tbsp. cornstarch
- 1/2 tsp. vinegar
- Food dye gel (various colors)
- 2 cups heavy whipping cream
- 5 Tbsp. confectioners sugar
- Fresh fruit or jam (optional)
Instructions
- Preheat oven to 375°F and line an 8" circular pan with parchment paper.
- Whisk together egg yolks, 4 Tbsp. sugar, oil, milk, and vanilla until combined.
- Sift in flour and cornstarch; mix until smooth.
- Beat egg whites until frothy; gradually add vinegar and remaining sugar until stiff peaks form.
- Gently fold whipped egg whites into yolk mixture without over-mixing.
- Divide batter into bowls, dye each portion as desired using food gels.
- Fill piping bags with colored batter and pipe designs onto prepared parchment.
- Bake for 8-9 minutes; cool completely before assembling with whipped cream.
Nutrition
- Serving Size: 1 slice (85g)
- Calories: 210
- Sugar: 16g
- Sodium: 50mg
- Fat: 10g
- Saturated Fat: 5g
- Unsaturated Fat: 4g
- Trans Fat: 0g
- Carbohydrates: 26g
- Fiber: 0g
- Protein: 3g
- Cholesterol: 90mg